Unable to SSH to Proxmox Default LXC Ubuntu 14.X and 16.X VPS

By default it’s not possible to establish a direct SSH connection to a Proxmox’s default Ubuntu 14.x or 16.x LXC VPS.

In order to SSH into a Ubuntu 14.x and 16.x LXC VPS you need to use NoVNC Console to apply following commands:

Modify /etc/ssh/sshd_config

nano /etc/ssh/sshd_config

Change Config

PermitRootLogin without-password to PermitRootLogin yes

Restart SSH Service

service ssh restart

wget: command not found

-bash: wget: command not found

You get this error when wget isn’t installed

To install wget on CentOS 5, 6 or 7 use this command:

yum install wget -y

To install weget on Debian or Ubuntu

 sudo apt-get install wget

Install Let’s Encrypt Certificate on Gitlab CentOS 7

Install epel-release. Epel-release provide you an extended set of packages

yum install epel-release -y

Install certbot

yum install certbot -y

Need to create a folder where the Let’s encrypt verification files will be stored

mkdir -p /var/www/public/letsencrypt

We need to configure Gitlab to pass any /.well-known requests to the desired folder.

Edit following file

vi /etc/gitlab/gitlab.rb

Find following Line below web_server[‘home’]

# web_server['home'] = '/var/opt/gitlab/nginx'
nginx['custom_gitlab_server_config'] = "location ^~ /.well-known {
    root /var/www/public/letsencrypt;
}"

Reconfigure Gitlab

gitlab-ctl reconfigure

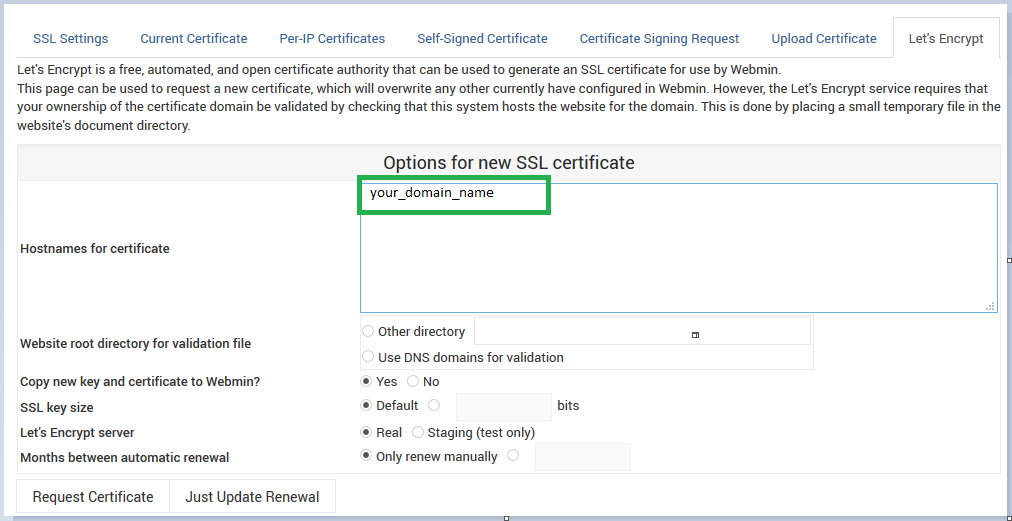
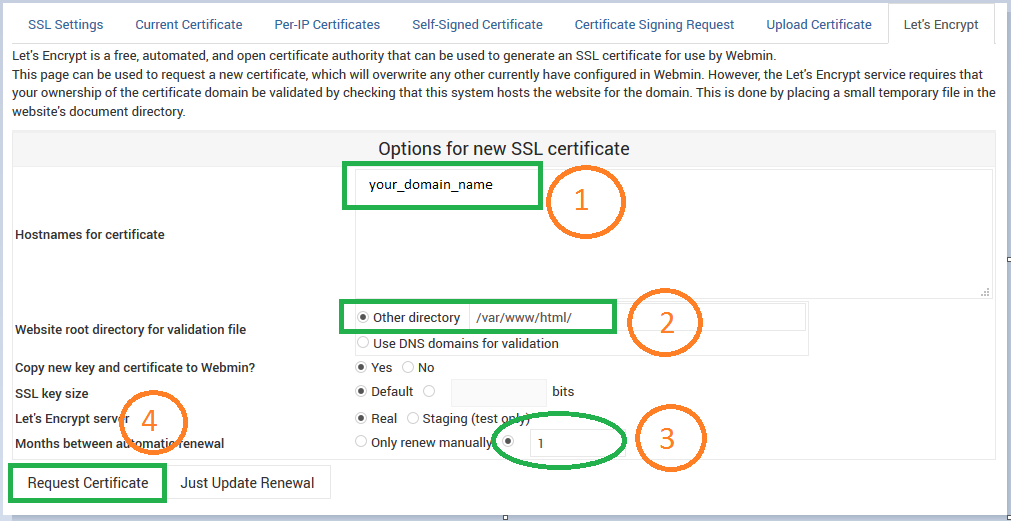
Now ready to request Let’s Encrypt Certificate

Use following command to request certificate

certbot certonly --webroot --webroot-path=/var/www/public/letsencrypt -d git.hostfav.com

You will get following message.

IMPORTANT NOTES:
 - Congratulations! Your certificate and chain have been saved at
 /etc/letsencrypt/live/git.hostfav.com/fullchain.pem. Your cert will
 expire on 2017-10-25. To obtain a new or tweaked version of this
 certificate in the future, simply run certbot again. To
 non-interactively renew *all* of your certificates, run "certbot
 renew"
 - Your account credentials have been saved in your Certbot
 configuration directory at /etc/letsencrypt. You should make a
 secure backup of this folder now. This configuration directory will
 also contain certificates and private keys obtained by Certbot so
 making regular backups of this folder is ideal.
 - If you like Certbot, please consider supporting our work by:


Configure GitLab for new Certificate

vi /etc/gitlab/gitlab.rb

Change External URL path

external_url 'https://git.hostfav.com'

Uuncomment this line. Change false to true

nginx['redirect_http_to_https'] = true

Change Certificate and Key files’ path

Find following two lines and uncomment them

# nginx['ssl_certificate'] = "/etc/gitlab/ssl/#{node['fqdn']}.crt"
# nginx['ssl_certificate_key'] = "/etc/gitlab/ssl/#{node['fqdn']}.key"

Update path

 nginx['ssl_certificate'] = "/etc/letsencrypt/live/git.hostfav.com/fullchain.pem"
 nginx['ssl_certificate_key'] = "/etc/letsencrypt/live/git.hostfav.com/privkey.pem"

Reconfigure GitLab and Apply changes

gitlab-ctl reconfigure

Let’s Encrypt certificate is only valid for 90 days. To renew automatically add following line to your corn job.

0 1 1 * * /usr/bin/certbot renew --quiet --renew-hook "/usr/bin/gitlab-ctl restart nginx"

This corn job will renew your GitLab Certificate every Month.

This improves the security of both the GitLab Server and the users who use it.

Add Let’s Encrypt Certificate to Webmin

Login to Webmin site using https://your-domain-name.com:10000

Once you log in, you will see Webmin Dashboard.

Click on your server’s hostname

You will be presented Hostname and DNS Client page.

Enter a fully qualified Domain Name into hostname filed and click on Save.

Go to Webmin Configuration then select SSL Encryption

Using following screen obtains and renew certificate.

We can setup Webmin to automatically renew certificate.

Hostname for certificate: Make sure you have typed correct Fully Qualified Domain Name

Website root directory for validation file: Enter /var/www/html/

Months between automatic renewal:  Select the radio button to the left of the input box and type 1 in the input box

Click on Request Certificate Button

After a few seconds, you will see a confirmation screen.

Restart Webmin

Reload the Webmin page and you browser will show valid certificate.


Great User Experience Award from FinancesOnline!

HostFav wins Great User Experience Award from FinancesOnline!

We are excited to announce that the experts at FinancesOnline have awarded HostFav with the 2017 Rising Star and Great User Experience Awards in the Hosting and Cloud Services Category.

FinancesOnline grants this exclusive award to new software in the field that, despite being a newcomer, has already earned positive feedback from its users. By testing HostFav features and culling user reviews from various sources, the reviewers over at FinancesOnline concluded that our software has the potential to be one of the top hosting services. The award validates our commitment to continuously enhance HostFav’s features and provide our customers with ready support.

Recently FinancesOnline published a detailed review of HostFav in which their praised our system as one that genuinely meets users’ expectations.

The Great User Experience Award is awarded to products that offer an especially good user experience. FinancesOnline evaluates how easy it is to start using the product and how well-designed its interface and features are to facilitate the work process.

HostFav’s contribution to the hosting market has recently been acknowledged by one of the most popular software and hosting review platforms FinancesOnline. The platform’s experts prepared a detailed analysis of our service and were very positive about the results of their test. In fact, we won the prestigious 2017 Great User Experience Award in the best hosting services category, and this award is given only to products with outstandingly intuitive interfaces and reliable service.

The award made us extremely proud and confirms the effectiveness of our commitment to top quality and innovative service. Most of all, it inspires us to continue pleasing our clients with top-notch uptime and support.

We want to say a big thank you to FinancesOnline for taking the time to review HostFav and for honoring us with the 2017 Rising Star and Great User Experience Awards!

HostFav cPanel Email Client Manual Settings

You can manually configure your mail client using the settings below:

Secure SSL/TLS Settings (Recommended)

Username: email@yourdomain.com
Password: Use the email account’s password.
Incoming Server: cpanel.hostfav.com

  • IMAP Port: 993
  • POP3 Port: 995
Outgoing Server: cpanel.hostfav.com

  • SMTP Port: 465
Authentication is required for IMAP, POP3, and SMTP.

Non-SSL Settings (NOT Recommended)

Username: email@yourdomain.com
Password: Use the email account’s password.
Incoming Server: mail.yourdomain.com

  • IMAP Port: 143
  • POP3 Port: 110
Outgoing Server: mail.yourdomain.com

  • SMTP Port: 25
Authentication is required for IMAP, POP3, and SMTP.

Notes:

  • IMAP email access coordinates between the server and your mail application. Messages that have been read/deleted/replied to will show up as such, both on the server and in the mail application.
  • POP3 does not coordinate with the server. Messages marked as read/deleted/replied to in the mail application will not show up as such on the server. This means that future mail downloads with POP3 will show all messages as unread.
  • Outgoing mail is sent using SMTP.
  • We recommend using POP3 over SSL/TLS or IMAP over SSL/TLS since they provide increased security for your interactions with the remote mail server.

Pointing HostFav’s Nameservers in Namecheap

Pointing HostFav’s Nameservers in Namecheap

1. Sign into your Namecheap account (The Sign In option is available in the top hat of the page).

2. Select Domain List from the left sidebar and click the Manage button next to your do

Namecheap Manage

3. Find the Nameservers section and select Custom DNS from the drop-down menu. Type following HostFav’s Nameservers and Click on the green checkmark to save the changes.

  • NS1.HOSTFAV.COM
  • NS2.HOSTFAV.COM

Namecheap Manage Custom DNS

4. Apply Changes

Apply Changes

NOTE: Once the nameservers are changed, all the custom DNS records for your domain will be overwritten to our hosting ones. You will be able to re-create them in your cPanel Advanced DNS Editor and MX Entry menu where you can manage domain’s email settings.

Nameserver changes do not propagate instantly. Once your nameservers are changed, it may take up to 24 hours (more, in rare cases) for local ISPs to update their DNS caches so that everyone can see your website.

Pointing HostFav’s Nameservers in GoDaddy

Pointing HostFav’s Nameservers in GoDaddy

If you purchased your domain name from GoDaddy, you’ll need to point it to HostFav in order to use it with HostFav’s Hosting. The best way to point your domain to HostFav is to update the nameservers in your GoDaddy account to HostFav’s nameservers. In other words, you will be telling GoDaddy to make HostFav the web host and email host for that domain.

1. Log in to your GoDaddy account.

There are currently multiple versions of the GoDaddy interface in production. If your GoDaddy dashboard does not match the steps and/or screenshots listed in this article, try following the steps in Set Custom Nameservers for Domains Registered With GoDaddy, then refer to our list of HostFav nameservers.

2. Go to Domains.

3. Click on Manage and then Manage DNS

Manage DNS

Or

Manage DNS

4. Go to Nameservers Section and Click on Change button
Change Nameservers

5. Type HostFav’s Nameservers

  • NS1.HOSTFAV.COM
  • NS2.HOSTFAV.COM

Hostfav's Nameservers

6. Click on Save to apply changes

Save Changes

After updating your nameservers, allow 4 to 8 hours for other networks to access information for .com and .net domain names, and allow 24 to 48 hours for other networks to access information for all other domain extensions. If you have difficulty, contact our 24/7 technical support team for assistance.